Around mid-2016, we at Motoko started a project that required, among other things, the creation of 16 animations. These animations featured dozens of characters that needed to walk, jump, and spin in an elastic and whimsical manner.


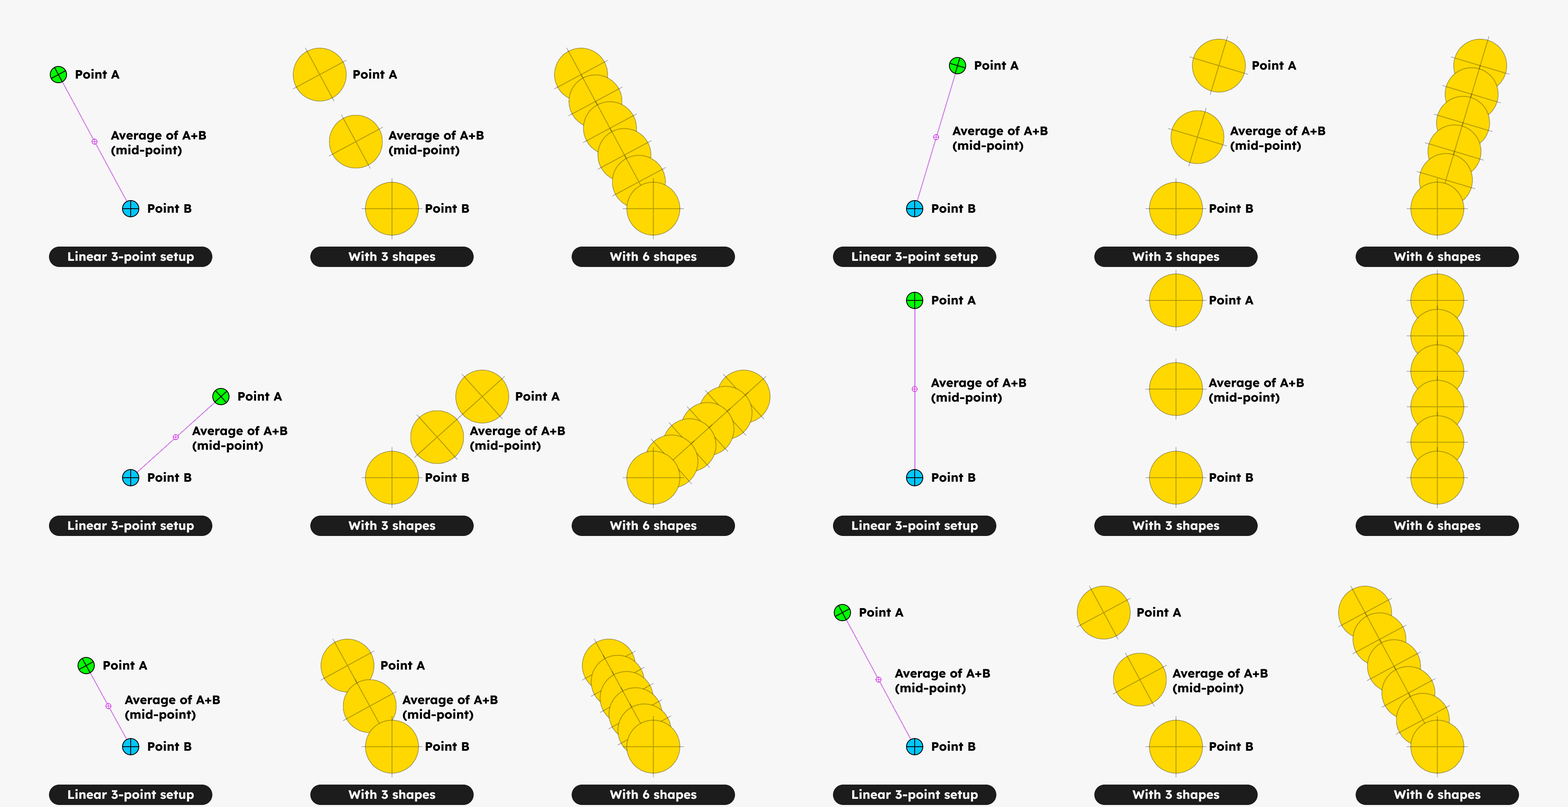
 With just a few lines of expression code in AE, you can distribute these objects along the line between points A and B. Paste the following code into the Position Expression of the layer that becomes the midpoint between layers Point A and Point B:

Three characters from the animation: we wanted them to be elastic, so the rigs should allow for bendy bodies.
During the character design process, we quickly realized that we couldn't animate them using the standard tools in After Effects. The little figures had snake-like bodies with fluttering hairs. And to those snake bodies, we wanted to attach arms, legs, and other accessories.

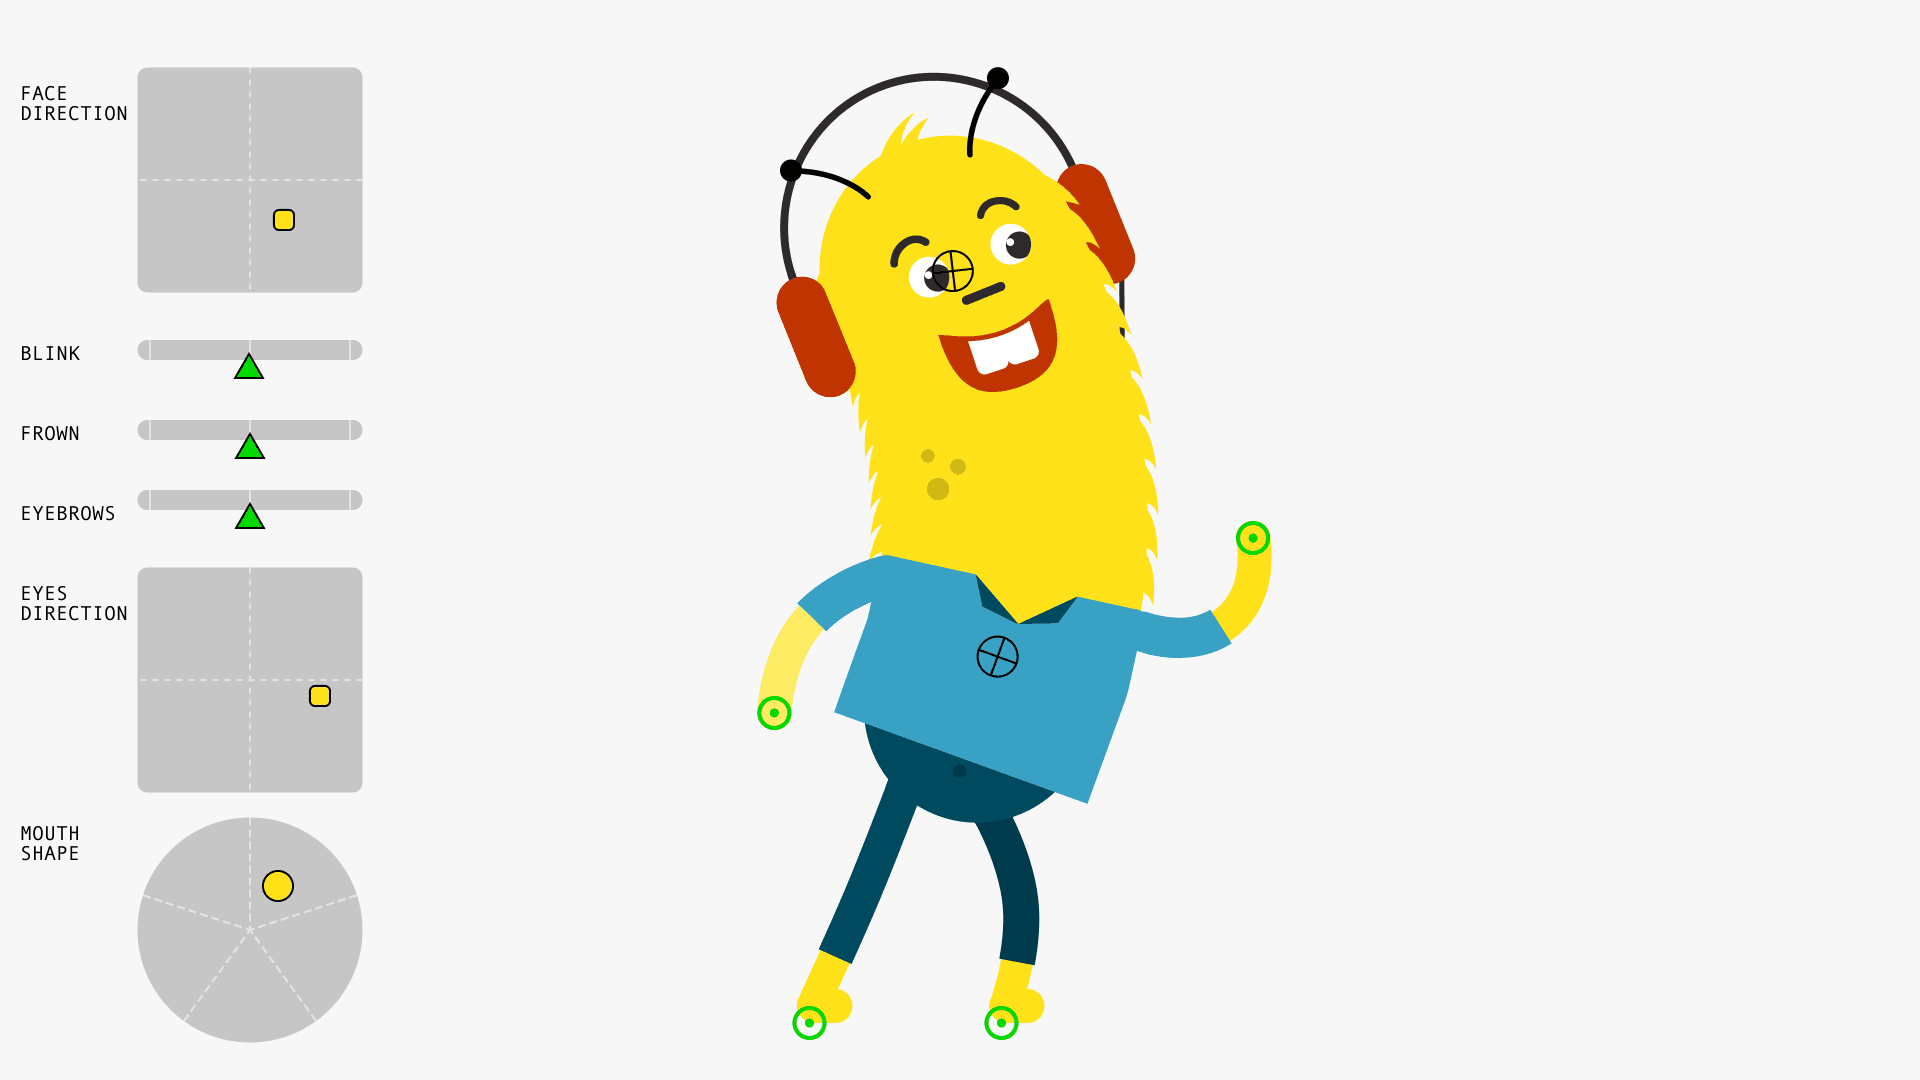
Snapshot of a rig with controls how we eventually used it in our production.
Probleem
We could solve the limbs with the Rubberhose plugin, but bending the snake-like bodies - onto which we wanted to parent arms, legs, and other objects - required a different solution.
The trouble with After Effects is that if we used a Bend distortion to bend a body, we couldn't parent any child objects to it. And since we also wanted to animate the child objects independently of the parent, it wasn’t an option to pre-compose everything before applying the bend.

If you use Bend distortion, any other layers that are parented to this layer will not follow the bended layer coordinates.
Solution (partly)
Then I suddenly thought of an old computer game that featured a caterpillar made up of various sprites, which moved and jumped in that segmented way. So essentially, we wanted to be able to link individual objects together.
A relatively simple way to do this is by averaging two points, and then placing a number of other points between them, spread along an imaginary line connecting those two points.

var midPoint = 0.5; // position of the center-point between point A and B, from 0 to 1. 50% is dead center.
var pA = thisComp.layer("Point A").transform.position;
var pB = thisComp.layer("Point B").transform.position;
var pC = mul(pA, midPoint) + mul(pB, 1-midPoint);
pC
And with the code below, you also calculate the rotation between points A and B. Paste this expression into the Rotation Expression of the layer that becomes the midpoint between layers Point A and Point B:
pA = thisComp.layer("Point A").transform.position;
pB = thisComp.layer("Point B").transform.position;
// calculate the angle between point A and point B
angleDeg = Math.atan2(pA[1] - pB[1], pA[0] - pB[0]) * 180 / Math.PI;
angleDeg = angleDeg - 90;
angleDeg
However, we ran into a problem: the points distributed along the path between points A and B - that is, the links or steps - move along a linear path from A to B. And if you move that back and forth, it doesn't look like a figure bending, but like a rigid, stiff shape.
Bezier Curve
So the first requirement was that the figure had to bend in a sort of curve. The second requirement was that the bending needed to be fast and simple—by adjusting just one parameter, we wanted to bend the figure from left to right.
What it boiled down to was that we wanted the links to follow a curve from point A to point B. And that these links would be distributed along that imaginary curved line, both in position and in rotation. A Bezier curve.
To be continued...

